Import room scans and trace objects
Written By Johan Hanegraaf
Last updated About 1 month ago
You can import individual room scans from your Meta Quest as editable Arkio geometry. This feature can be accessed from Arkio's Start menu > Import > Import Room.
Meta room scans
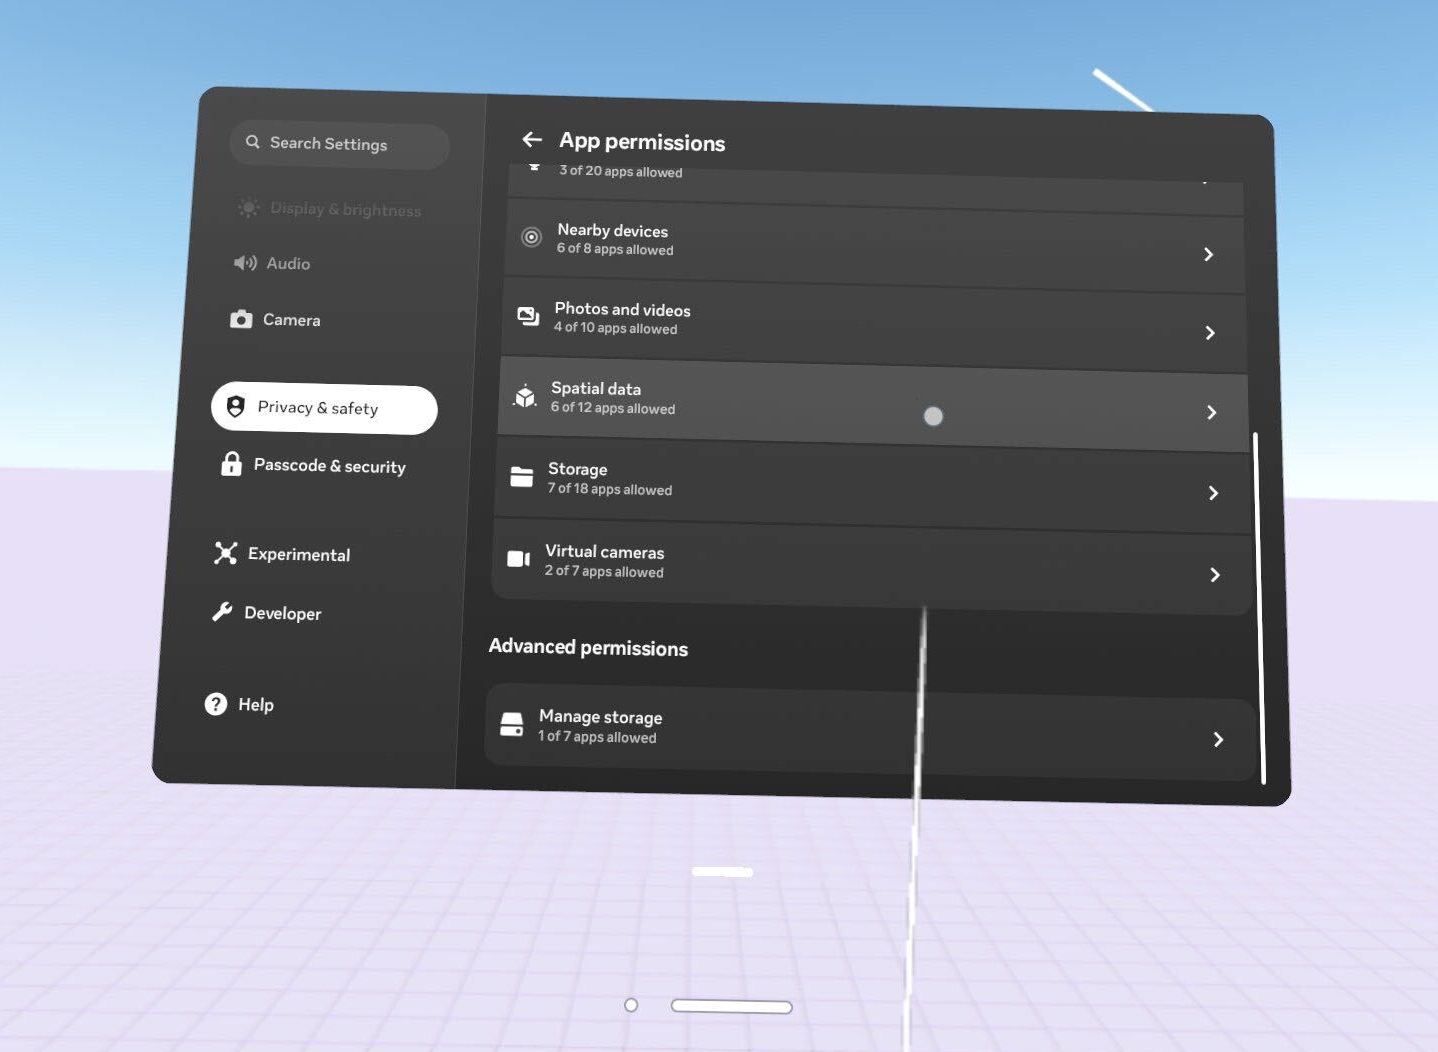
Meta's Room setup tool automatically maps walls, windows, doors, and other objects, such as tables and cabinets, for each room, so manually drawing elements, as shown in the video above, is no longer necessary. Arkio requires access to your device's "Spatial Data" to enable this feature. You can control this in your device's privacy settings.
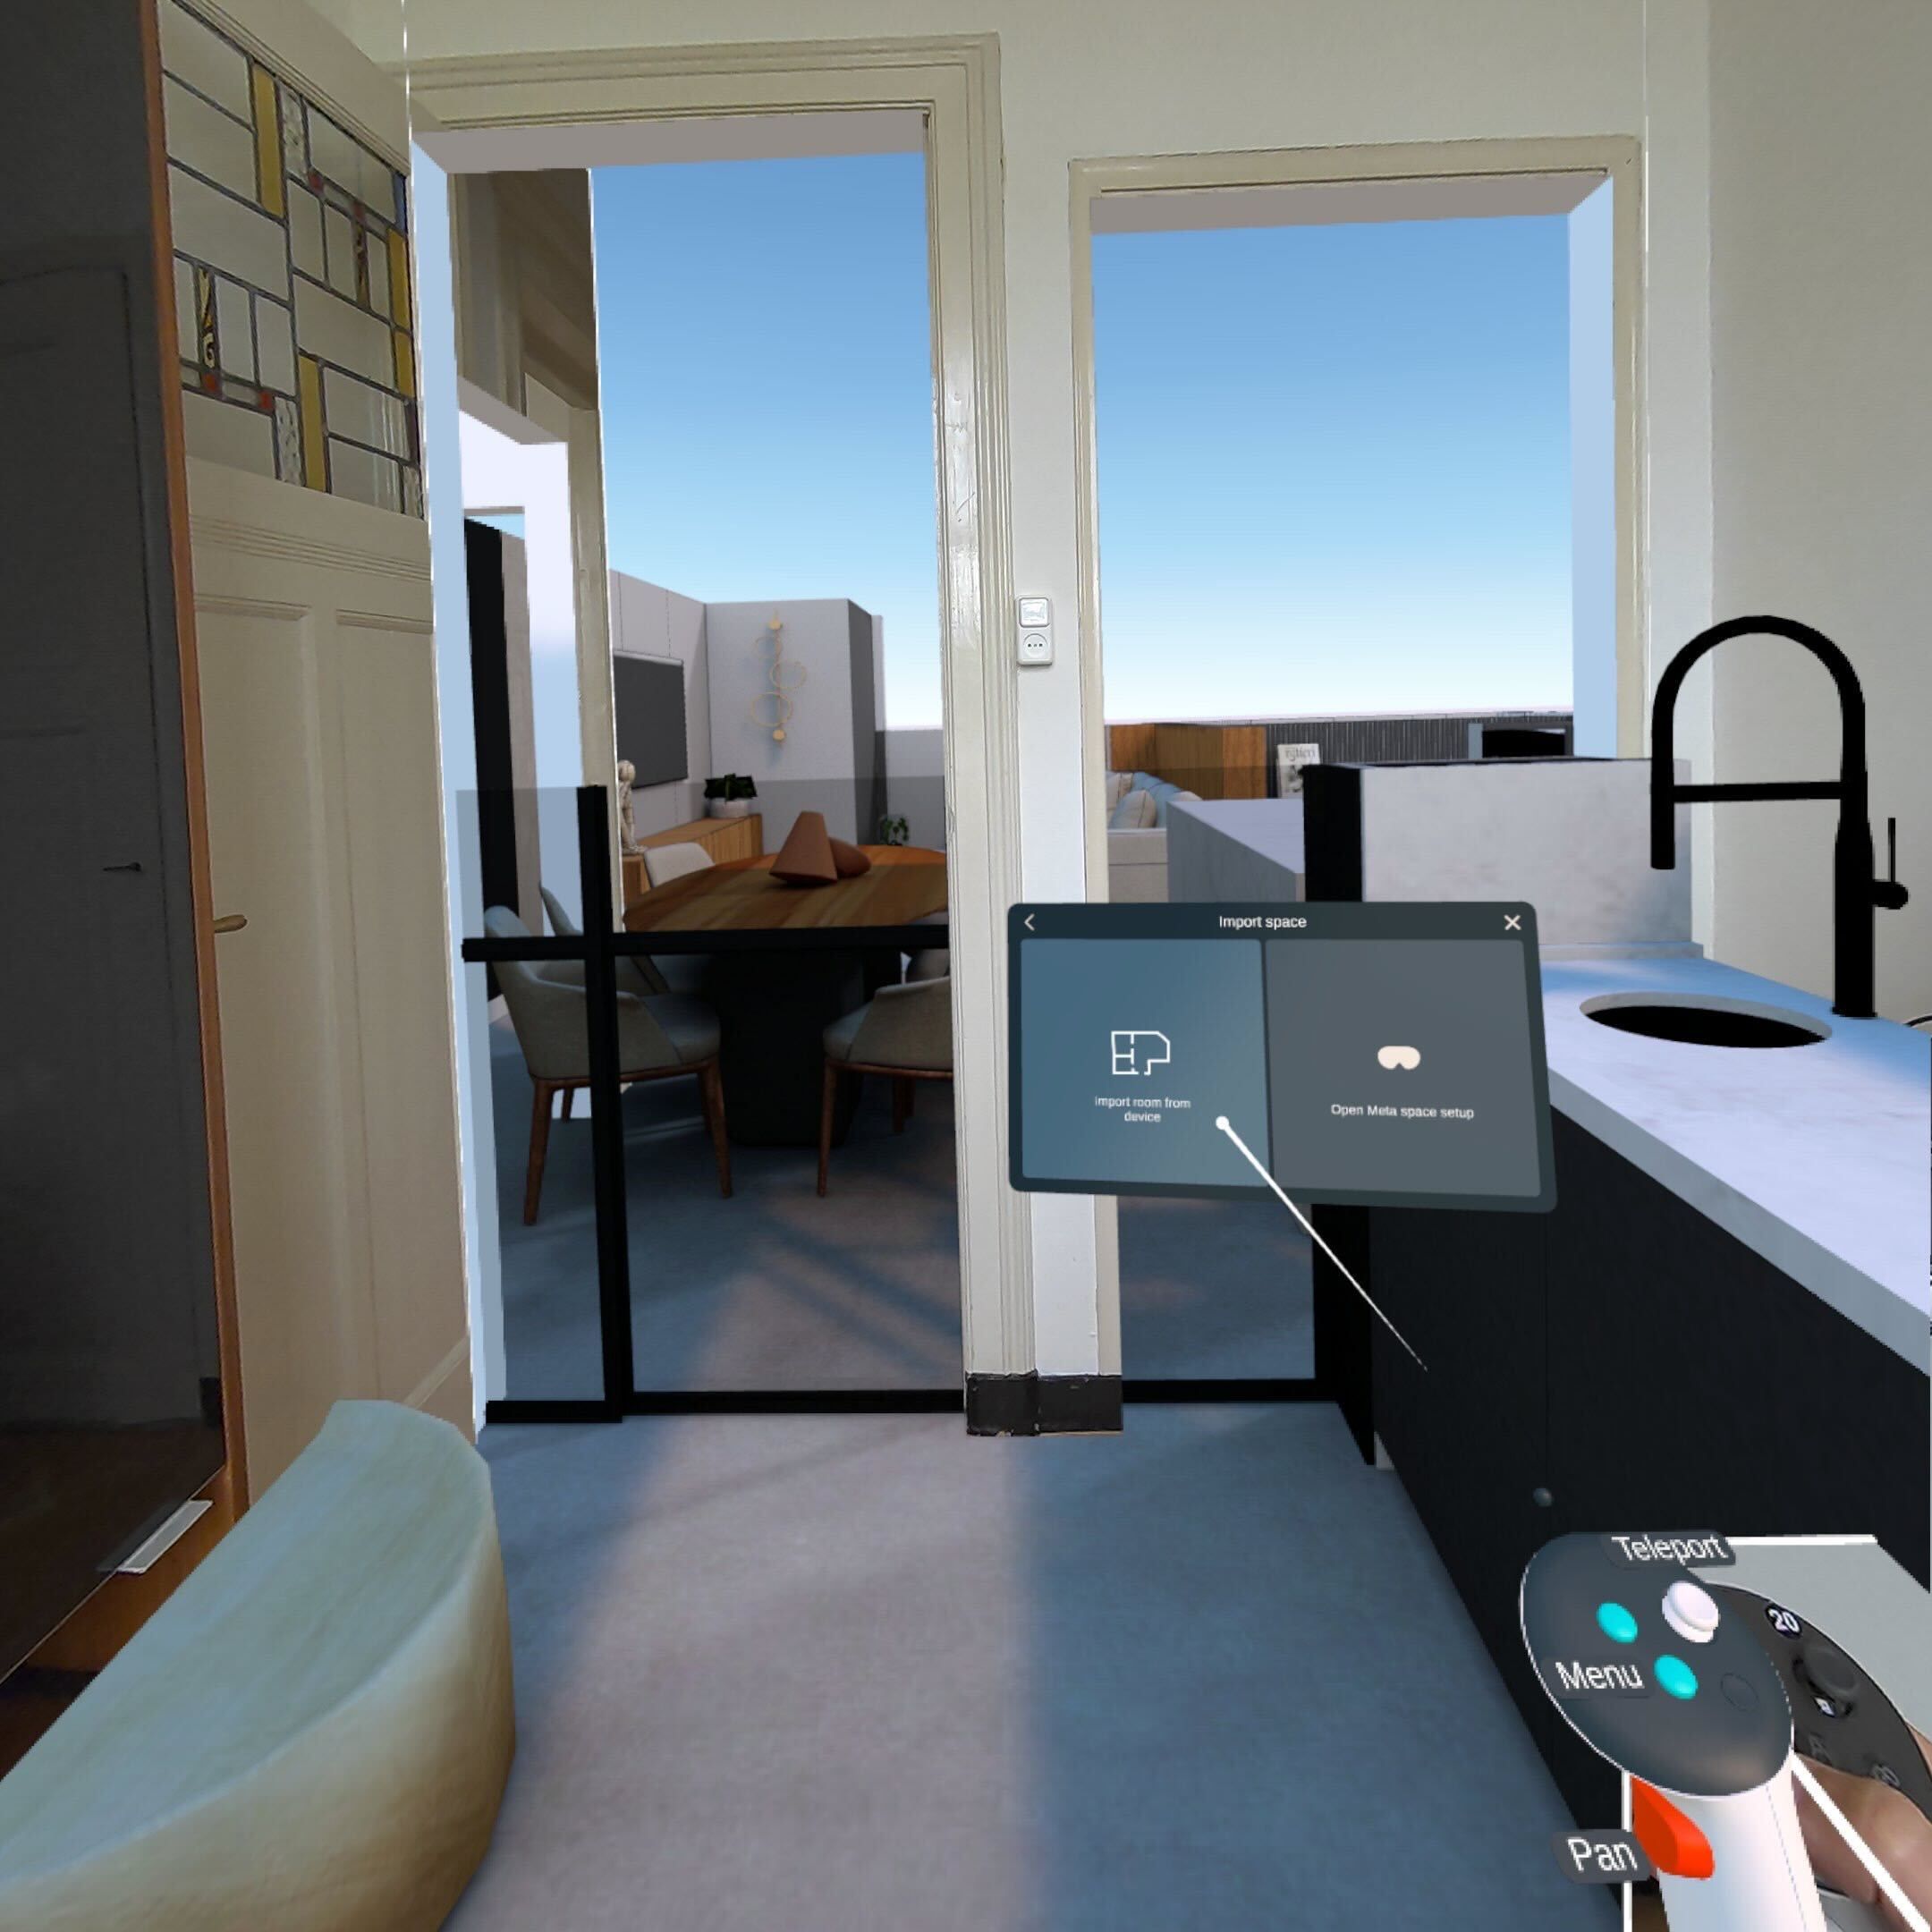
After your room is scanned, you can import your current space into Arkio using the "Import Room" button in the Start menu > Import > Import Room.
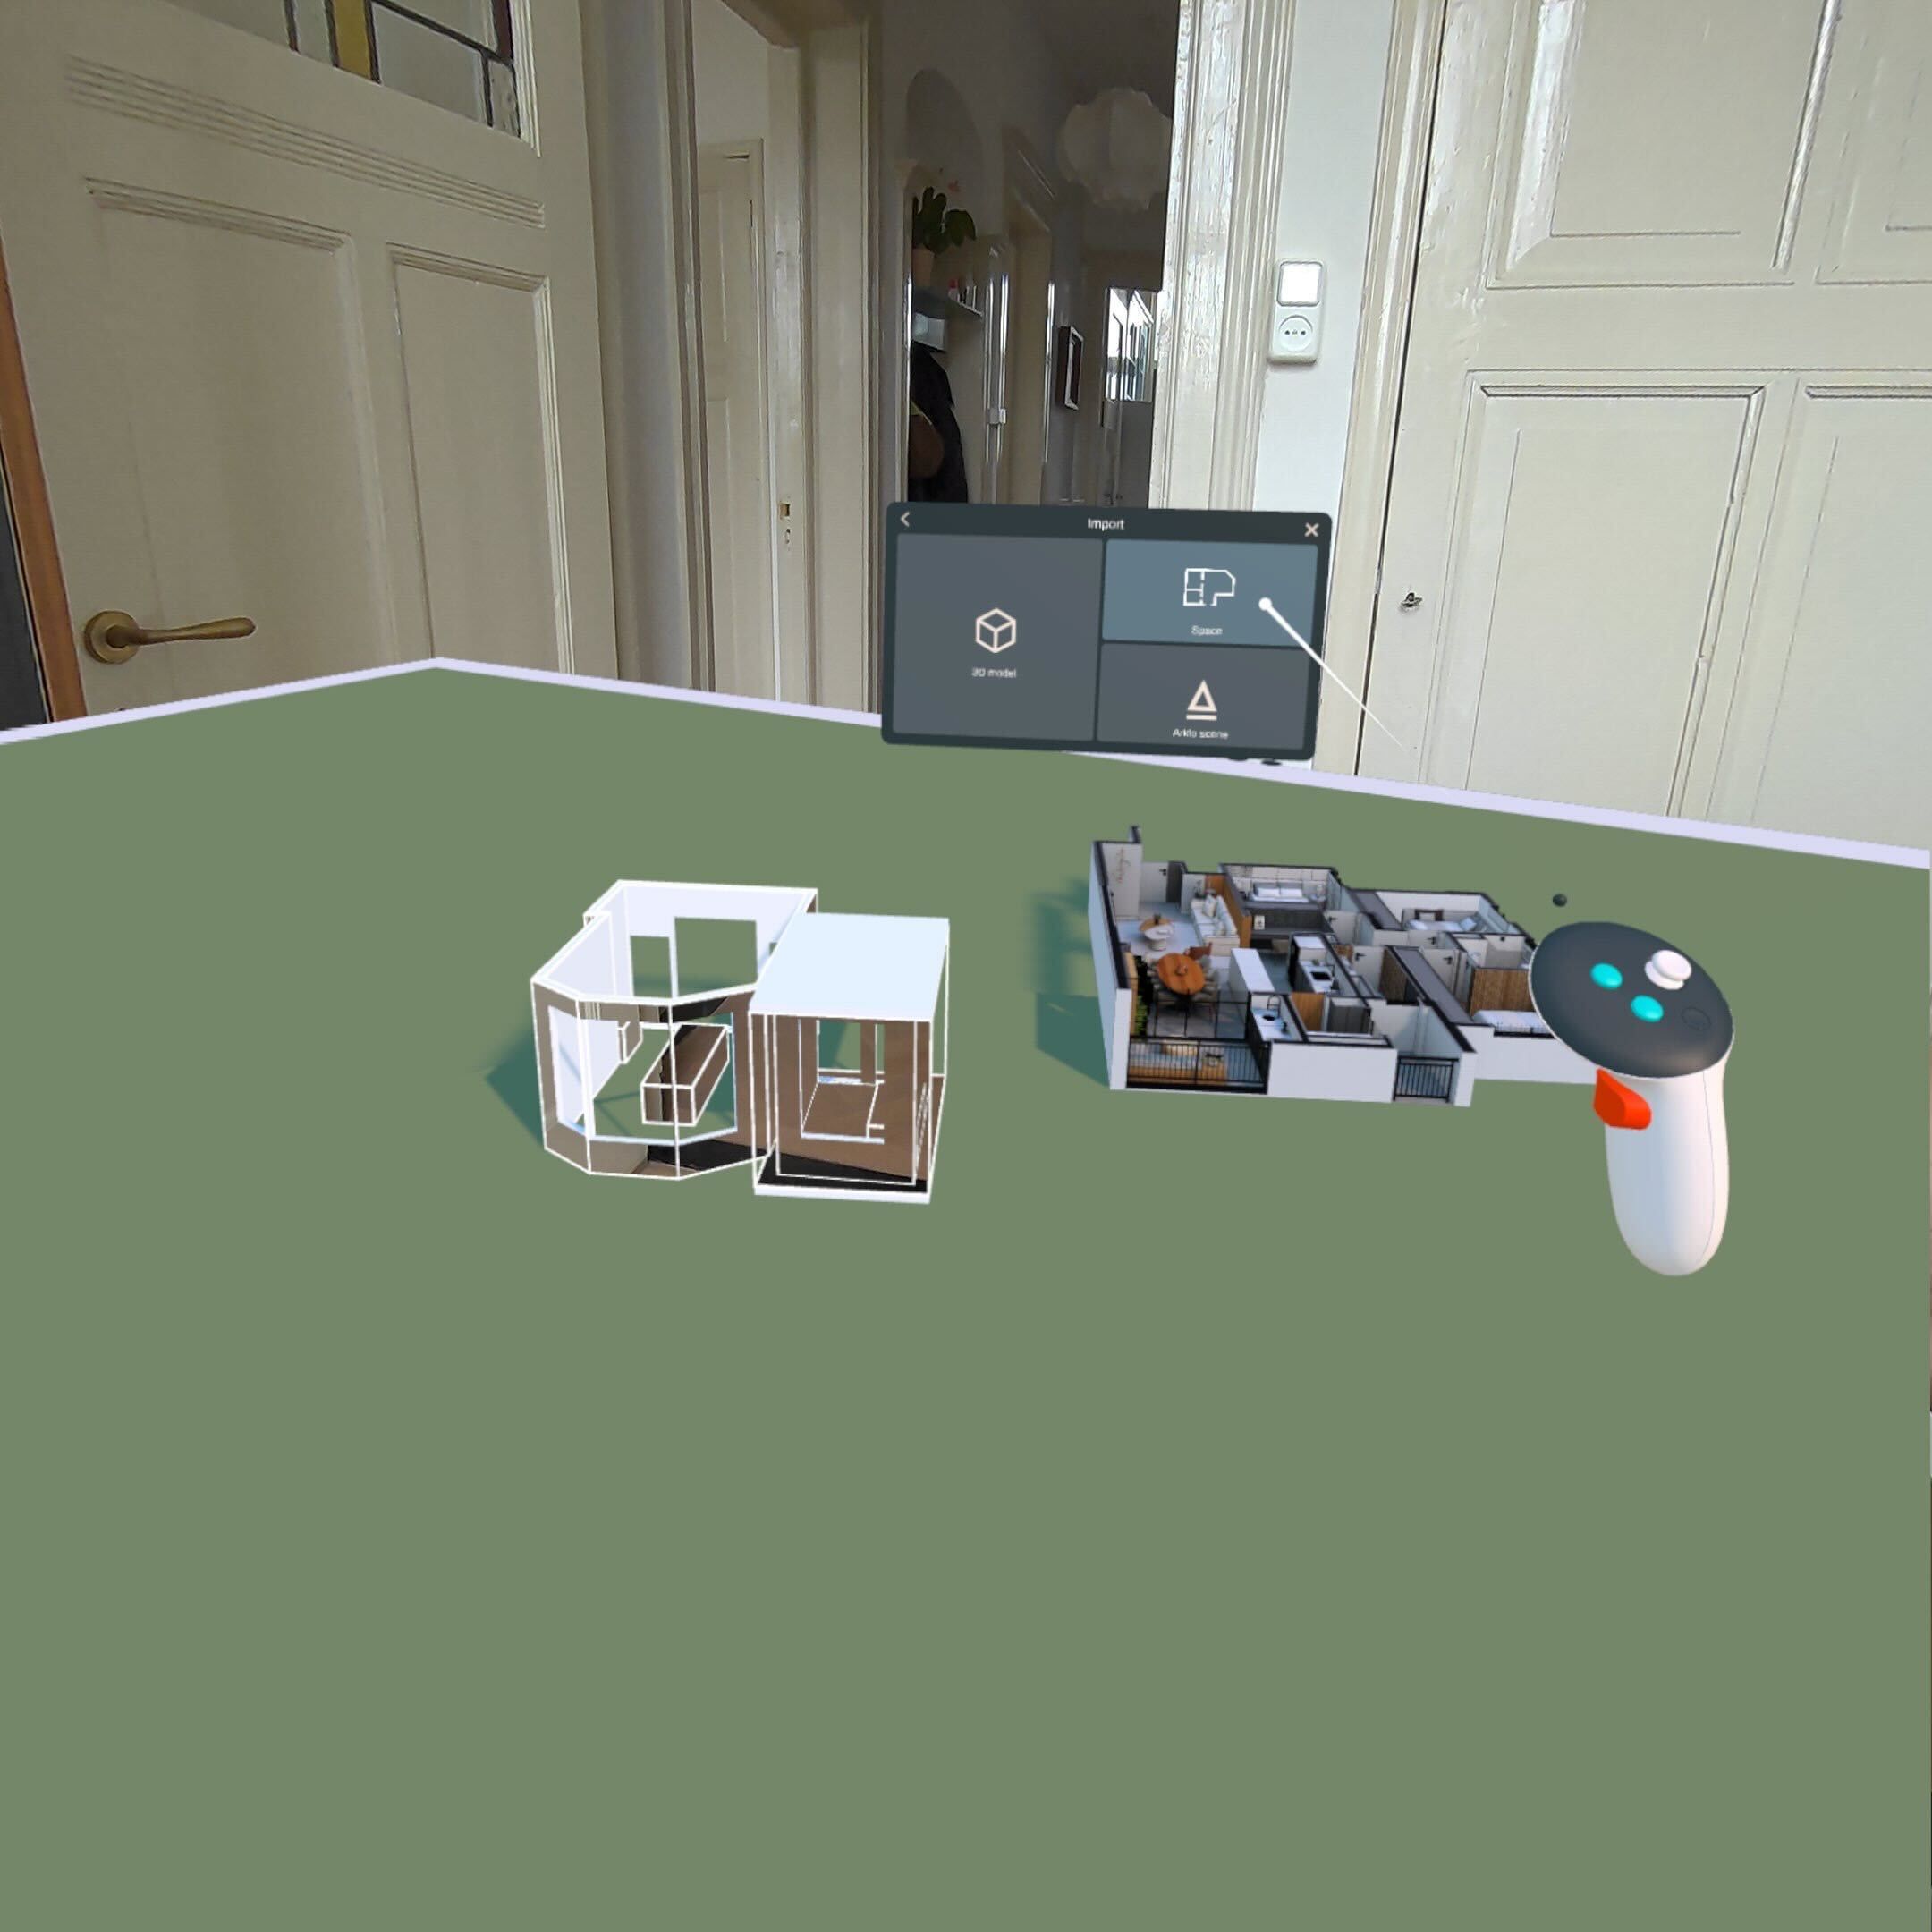
This will import your walls, windows, doors, and furniture objects into Arkio geometry, which you can adjust or move in your current scene to start mixing with other elements in Arkio.
Loading your room scan in Arkio
When you load a room, your room will appear in the center of your active Arkio scene with a teleport marker. Teleporting into this room will align your position with it in 1:1 scale. You can always toggle the lock on your wristband to adjust this alignment with your geometry in 1:1 scale.
Meta's room scanning feature only works for individual rooms. You can import multiple rooms into a single Arkio scene by repeating the room-scanning and import steps for each room. This will result in individual rooms enclosed by walls in Arkio. To create an entire floorplan of your house, you can export these results from Arkio to other floorplan design applications or professional 3D design tools like Revit and SketchUp or use Arkio's modeling feature to build out a fully editable model yourself.
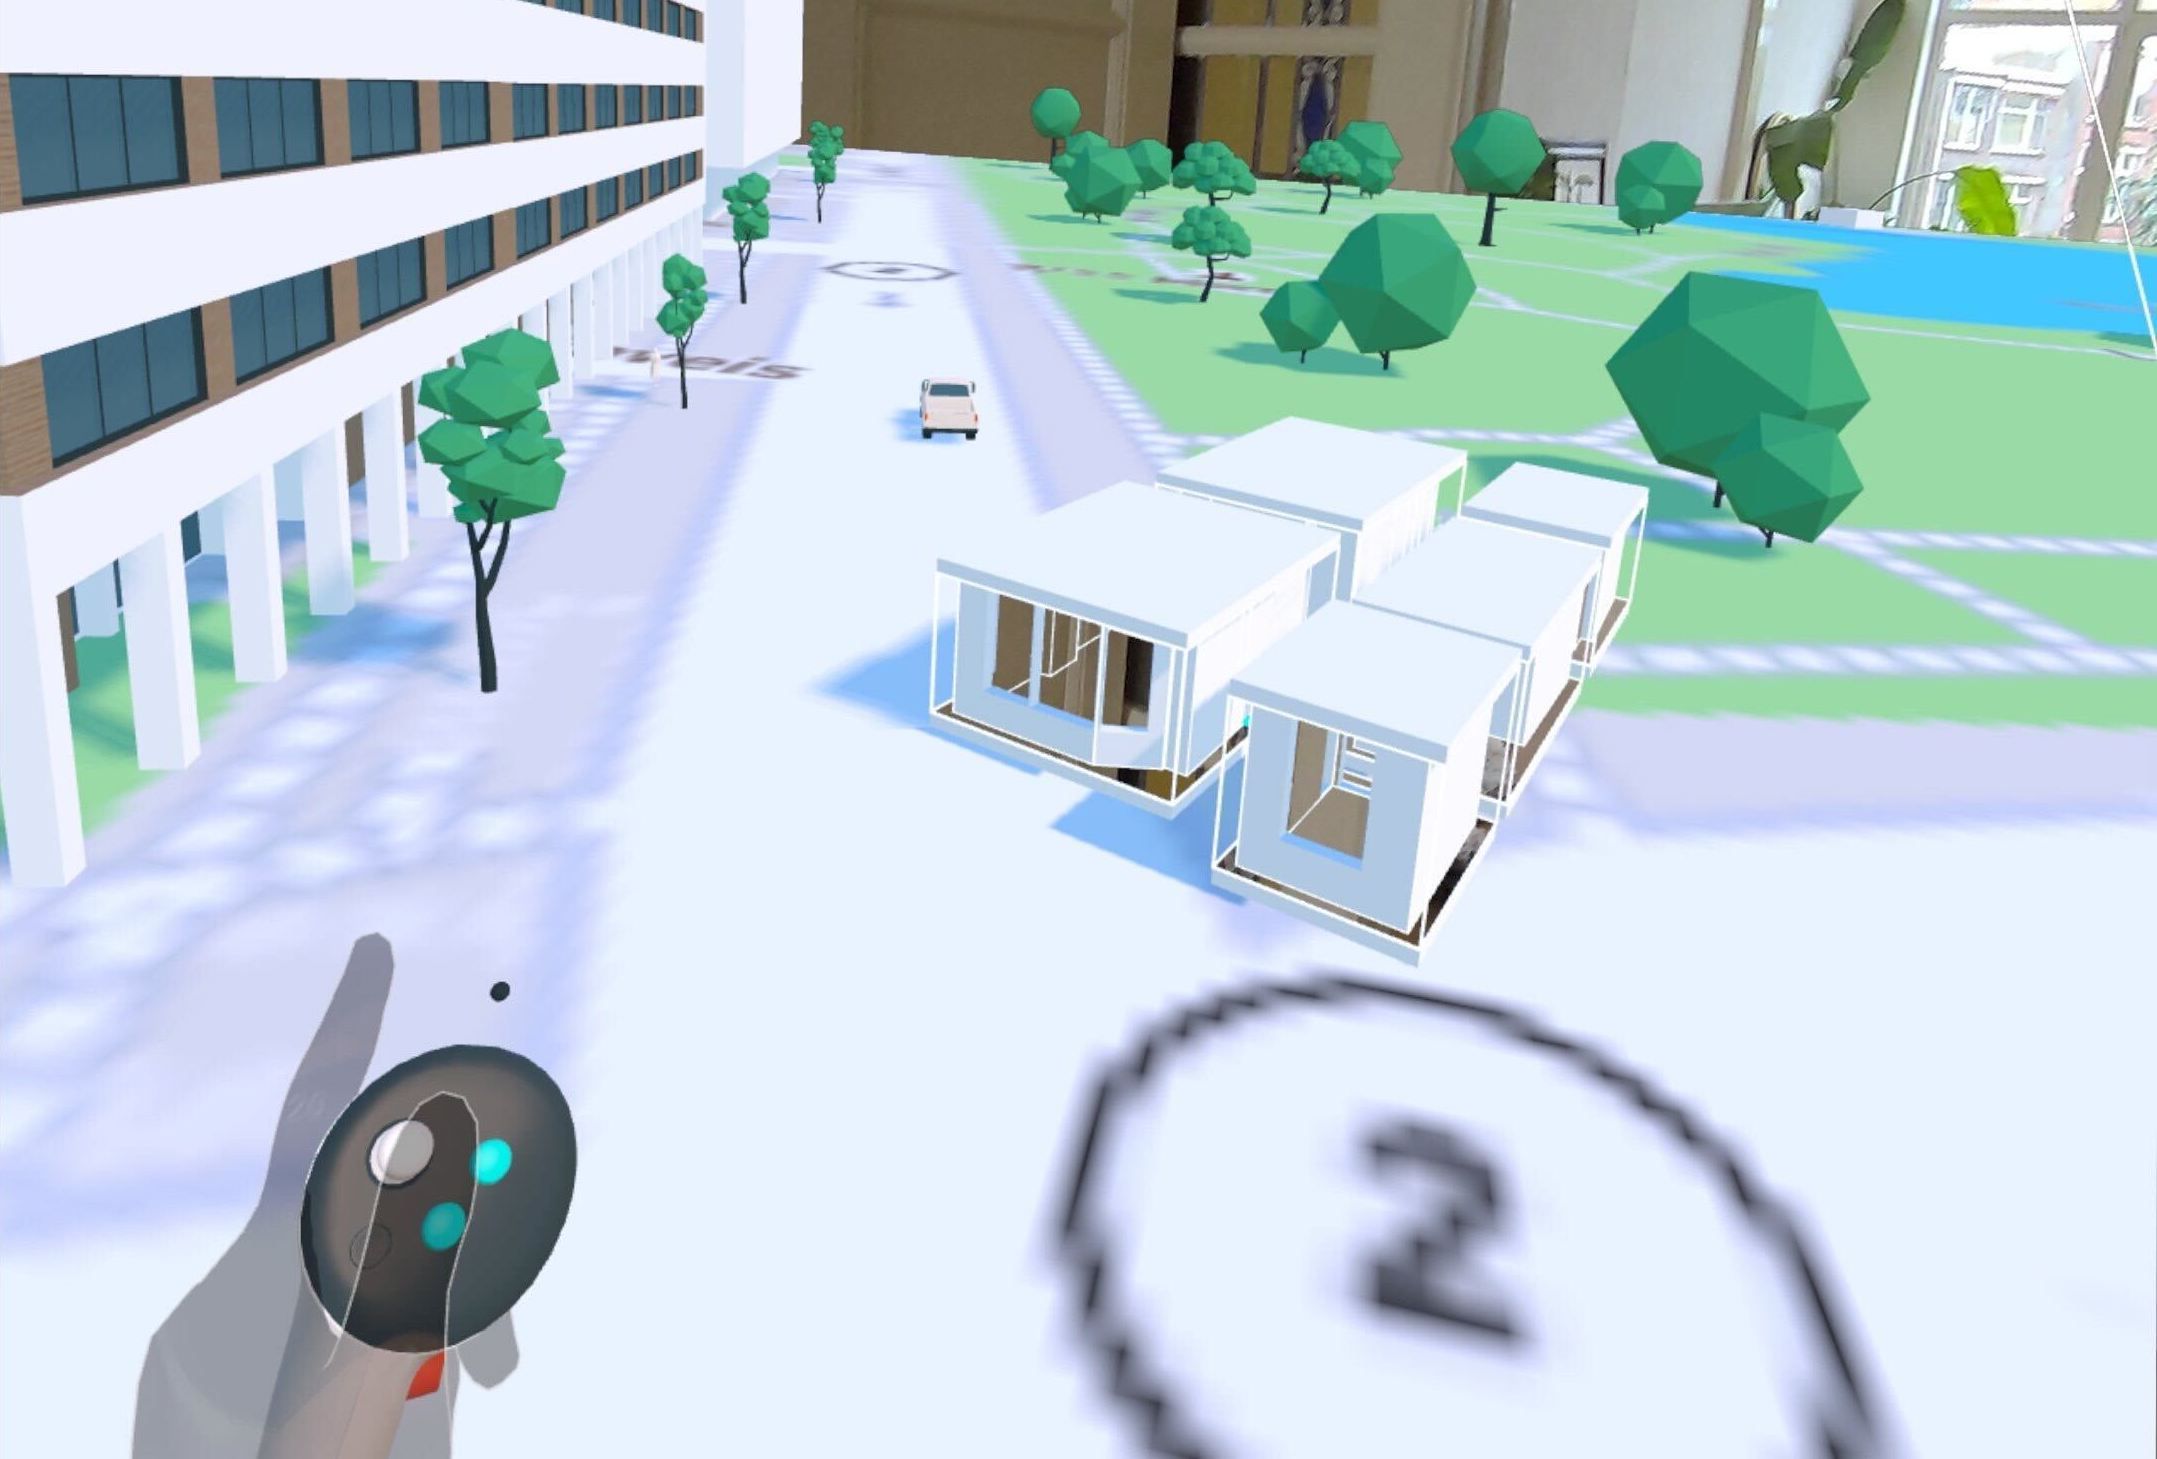
After importing rooms into your scene, you can move individual rooms, including their top and bottom surfaces, walls, doors, furniture and the 1:1-scale teleport mark, using the move tool. You can also adjust imported models after they have been imported, or overtrace 3D environments spanning multiple rooms, using Arkio's flexible geometry.
Note: Space setup is a Meta feature on your Quest. You can learn more about this feature on Meta's website. Some rooms may fail to convert to Arkio geometry. In that case, you can try a simpler room instead. Mapped walls and other elements in the space setup might become visible in other Meta Quest apps. You can clear space setups from the Boundary settings>Space Setup tab in your Quest.
Trace geometry directly in Arkio
You can also trace your environment directly in Arkio by teleporting to 1:1 scale and drawing shapes with the passthrough material.
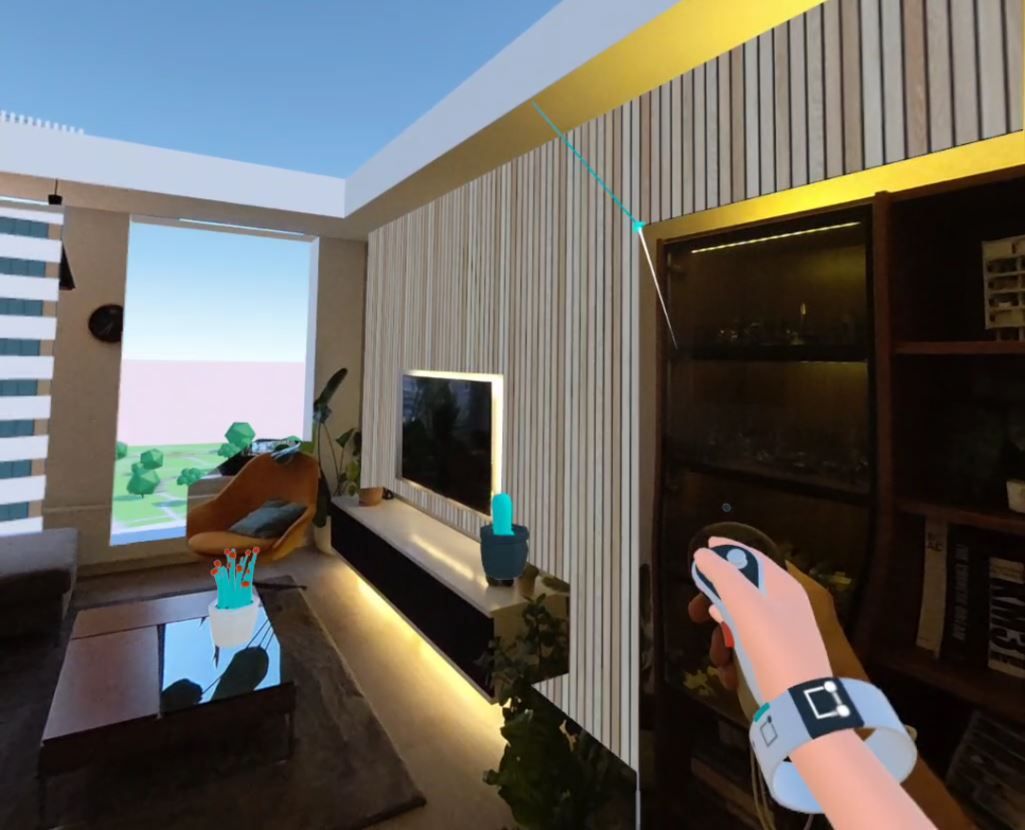
When you draw with this material in passthrough mode, you will see white outlines around your objects so you can align things better. Disabling passthrough mode on your wristband turns off these white outlines, but still displays passthrough material on these objects for enhanced MR immersion.
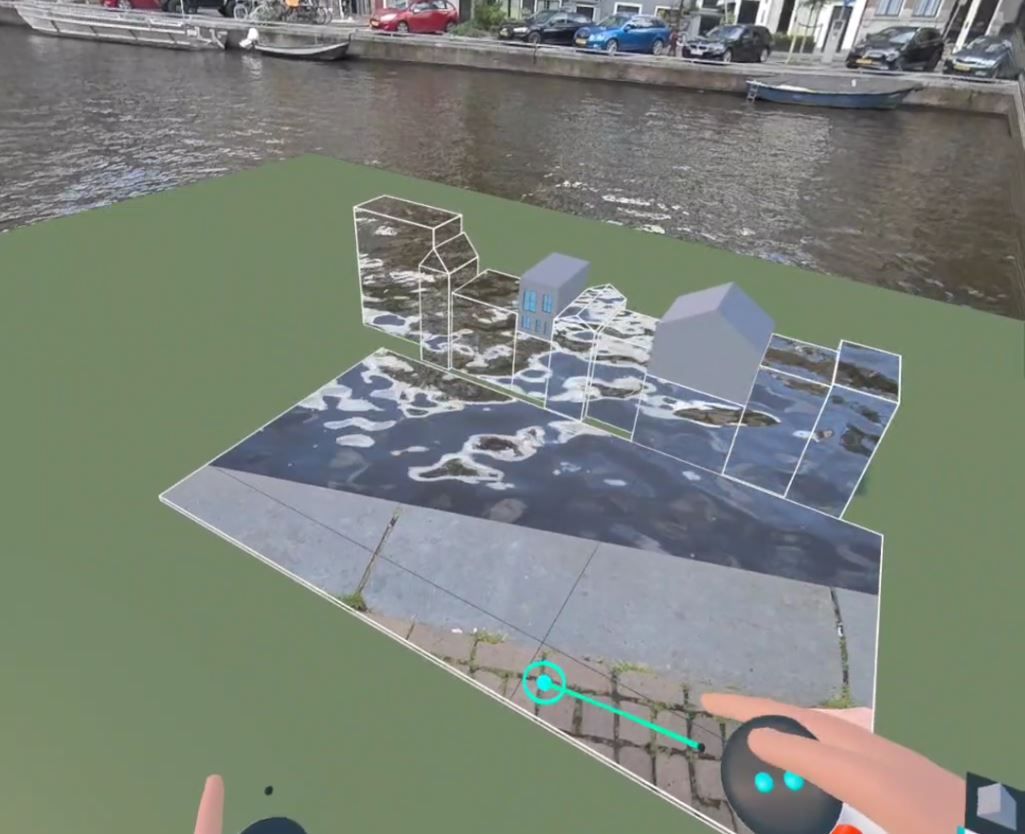
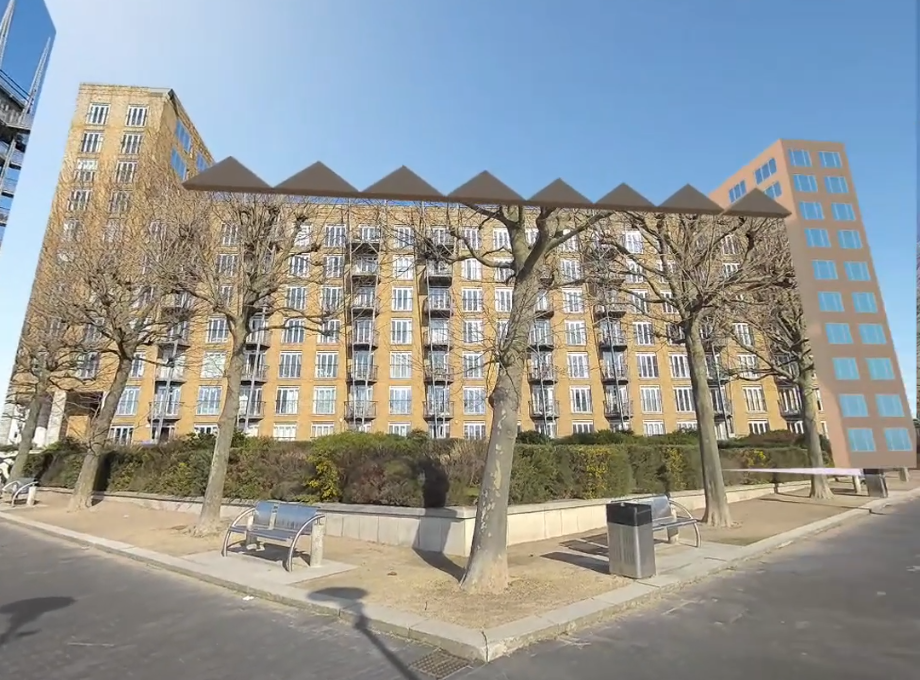
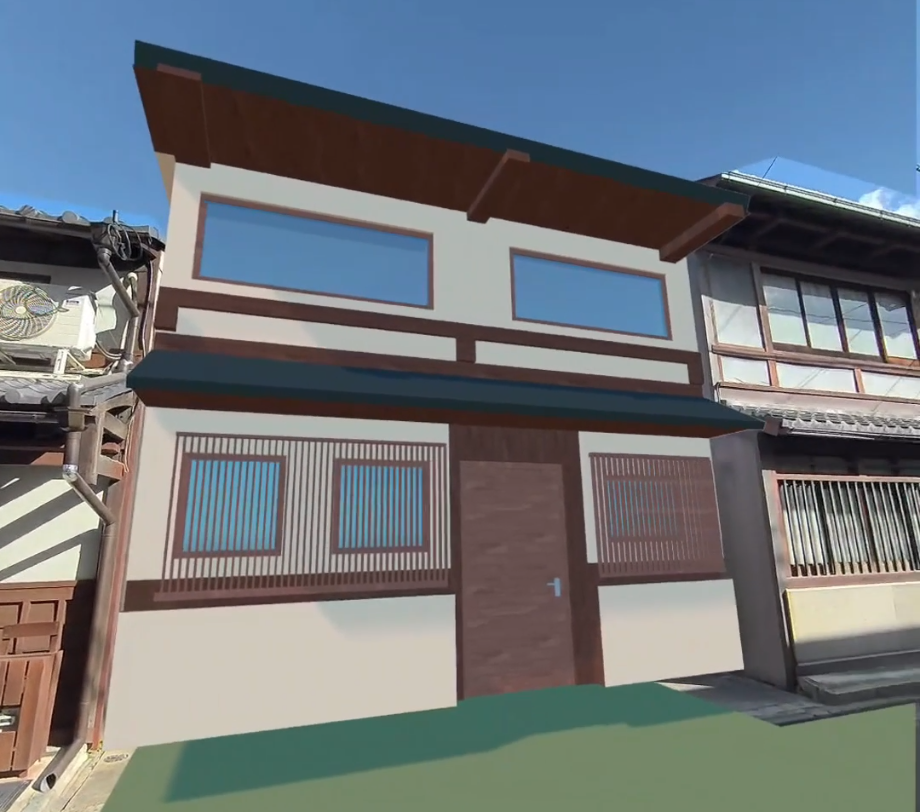
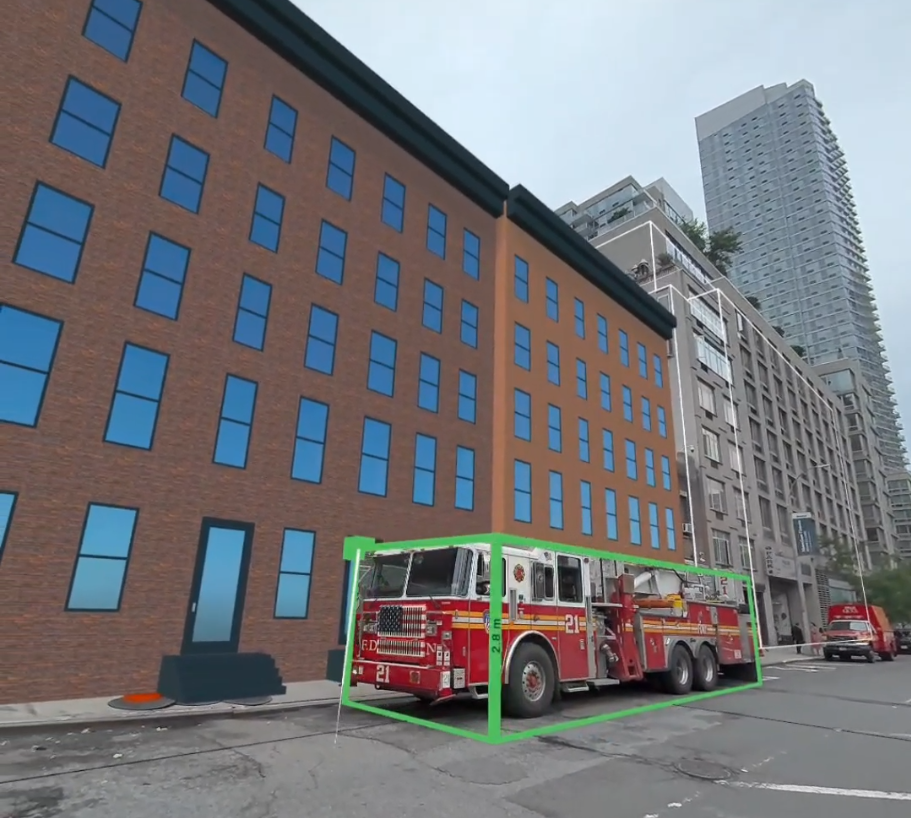
You can use Arkio's geometry to create hollow shells with inner surfaces that align with your current space, or blend virtual objects with real objects by modeling floor, wall, and ceiling elements painted with the passthrough material. Using Arkio's modeling tools, you can also map out more complex environments, like cityscapes, where imported or newly created geometry can be blended with real-world geometry.

Once your space is mapped using passthrough volumes or imported geometry, you can manipulate your environment by painting objects, cutting holes in reality using passthrough volumes, and experimenting with other fun effects, such as replacing parts of reality. You can visit our social media and community pages to see examples of what's possible.