Import images and drawings
Written By Johan Hanegraaf
Last updated 5 months ago
Loading 2D images, such as drawings, sketches, or photos, can be helpful during the design process for experiencing human-scale sizes and for presenting your work. We currently support loading JPG and PNG files.
Loading custom Images to Arkio is easiest using the Arkio Cloud. After linking and uploading your images, or placing the image files in your device's Arkio\Import\Images folder, they can be found under the Import tab of your Create tool.
Load images in your scene
You can place images in the scene by inputting the desired width (in meters) and clicking in the scene where you want to place the image.

Imported models and images can be placed at the table origin using the two green buttons in the import panel. This will place the geometry in the current or a new Arkio scene and pin the geometry in place. Manually positioning the image by clicking anywhere in the scene while it's selected gives you more control over where to place it.
Scaling images to the correct size
After placing the images in the scene, you can adjust their size by stretching the corners using the edit tool. You can move and rotate these images in your scene by touching and moving them with your VR controllers.
If you have a dimension on that drawing, you can create a box in Arkio with those dimensions to use as a 3D reference to scale your image to it, or you can estimate the size of things by placing an Arkio prop, like a person/car, as a scale reference.

You can find more tips on scaling your images and 3D references in our community page
Creating 3D Arkio geometry from 2D plans
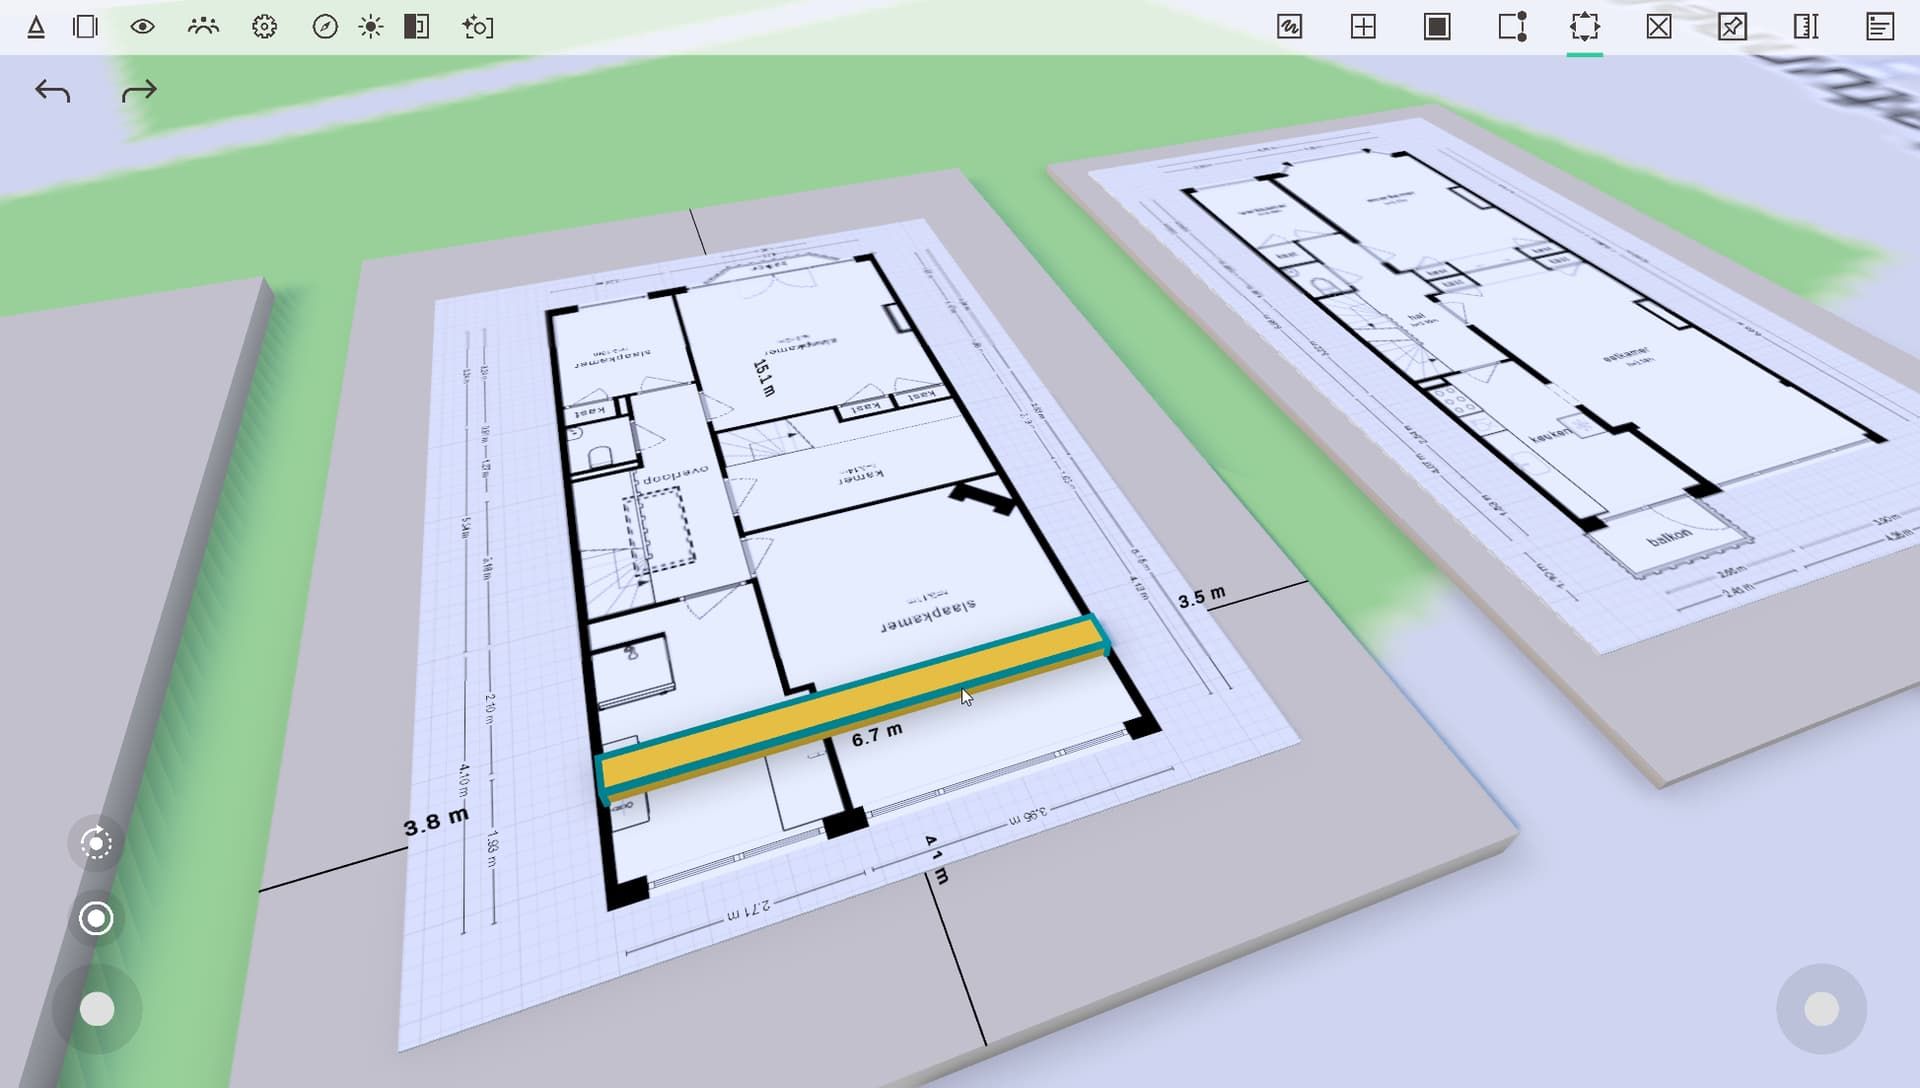
Images and imported models can intersect with Arkio's solid geometry so that you can use them as a design reference from your 2D floorplans/sections. To do this, place the images in the scene and use the Move tool (laser or grab the image with your hand) to position the image where you want to align and overlap your Arkio 3D geometry. You can then use Arkio's solid primitive shapes, walls, and other components to draw a 3D version of your design, allowing you to experience it in human scale.

If you have trouble aligning it to the correct plane, try disabling the snaps/guides (main controller thumbstick down) or get a bit closer and make yourself smaller to work with more accuracy. Thin images can be harder to grab and move than solid Arkio geometry. You can always make your image a bit thicker by stretching the size.
If you'd like to import floorplans or sections from your favorite CAD application, we recommend exporting your drawings as PNGs, as this has a cleaner compression to see linework and text more clearly.
You can find more tips on working with 2D references to create floorplans on our community
Loading other presentation materials
You can also load images as artwork, posters, branded content or full presentation slides into your scene. When placing several images next to each other or creating a stack of images as slides and removing the front image to reveal the slides below. This allows you to give interactive presentations inside Arkio.

You can see examples of this in Arkio's tutorial scenes. We've seen users create scenes with images to show company branding and portfolio presentations, trade show booths, movie and theatre sets, and other interesting designs. And we’re curious to see what you will create.
Loading Arkio camera images
You can also use Arkio's AI camera tool to create photos and load them into the scene as frames.
